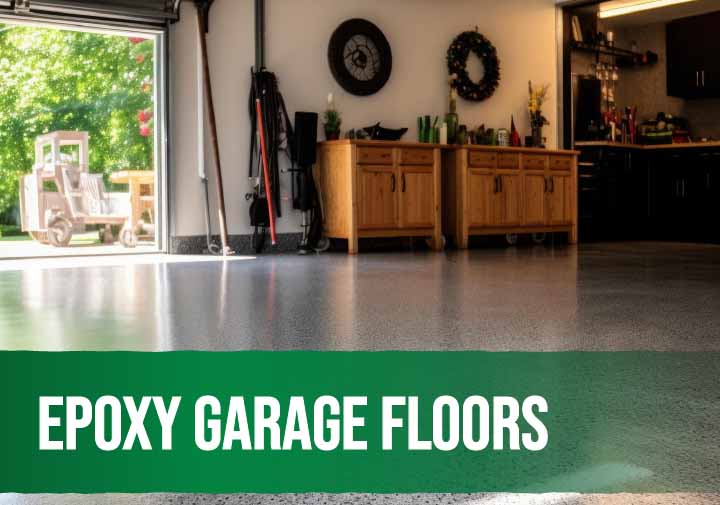
If your garage floor looks like a crime scene of oil stains and cracked concrete, an epoxy coating is the upgrade you didn’t know you needed. It’s durable, easy to clean, and genuinely looks great. Here’s everything you need to know before you commit.
What Is an Epoxy Floor Coating?
Epoxy is a two-part system made from resin and hardener. When mixed together, it bonds directly into the concrete surface and hardens into an incredibly tough, durable finish that lasts for years.
This is completely different from paint. Standard floor paint just sits on top of your concrete like a thin layer. It doesn’t stick properly, which is why it chips and peels. Epoxy actually penetrates into the concrete and chemically bonds to it. This creates a rock-solid connection that doesn’t peel or fail.
That’s why epoxy lasts so much longer than paint. It’s not just a coating you can wipe off. It becomes part of your concrete floor. Paint can’t handle that kind of abuse.
What epoxy gives you:
- Resistance to chemicals, oil, grease, and brake fluid
- A surface tough enough for daily vehicle traffic
- An easy-to-clean, seamless finish
- A serious visual upgrade from bare grey concrete
Epoxy coatings are standard in warehouses and commercial spaces. In residential garages, they deliver the same results at a fraction of the scale.
Epoxy vs Flake vs Metallic Finishes
Selecting the right epoxy finish depends entirely on the aesthetic you want to achieve and how the space will be used. While all epoxy systems provide a highly durable, seamless surface, their visual characteristics and physical textures vary significantly ranging from cleanliness to high-end architectural focal points.
Not all epoxy floors look the same. Here are your main options:
| Finish Type | Look | Best For | Slip Resistance |
| Solid colour epoxy | Clean, flat single colour | Workshops, commercial spaces | Medium (add grip flakes) |
| Epoxy flake floor | Speckled / terrazzo-style | Residential garages | High (texture from flakes) |
| Metallic epoxy | Swirling, 3D effect | Showrooms, statement spaces | Medium (add top coat) |
Flake floors are the most popular choice for residential garages. They hide minor imperfections, provide grip, and look great without being over the top.
How an Epoxy Garage Floor Is Installed
This isn’t a brush-and-roll job. Professional epoxy application is a multi-stage process. And each stage matters.
Surface Prep & Grinding
This is the most important step, and the one DIYers most often skip.
- The concrete must be diamond ground to open the surface and allow the epoxy to bond
- Cracks and holes are filled with an epoxy filler or polyurea
- Oil contamination is treated separately — oil-soaked concrete won’t bond
- The floor is vacuumed clean before any product goes down
No grinding = no adhesion = delamination. This is the number one reason epoxy floors fail within a few years.
Coats & Cure Time
Once the floor is prepped:
- Primer / base coat — Applied first, soaks into the ground concrete
- Flakes (if applicable) — Broadcast into the wet base coat for full coverage
- Top coat / sealer — Locks everything in and delivers the glossy, durable finish
Each coat needs time between applications. Full cure time to vehicle-ready is typically 5–7 days.
How Much Does an Epoxy Garage Floor Cost?
Cost depends on garage size, concrete condition, and finish type.
| Garage Size | Estimated Cost (Professional) |
| Single car (15–20m²) | $800 – $1,500 |
| Double car (30–40m²) | $1,500 – $3,000 |
| Large garage or workshop | $3,000 – $5,000+ |
What Actually Affects Your Final Cost
These price guides are just estimates. Your actual cost depends on what your garage needs.
Main things that change the price:
- How much concrete prep is needed – If your floor has lots of cracks, oil stains, or moisture issues, that costs more to fix properly
- Which epoxy coating you choose – Different finishes (solid colour, flake, metallic) cost different amounts
- Local labour rates – Tradespeople charge differently depending on where you live in Australia
DIY Kit vs Professional Application
Cost
- DIY Kit: $100 to $300
- Professional: $800 to $3,000+
Surface Prep Method
- DIY Kit: Acid etch (creates a weaker bond)
- Professional: Diamond grinding (creates a proper, lasting bond)
Product Quality
- DIY Kit: Consumer-grade with thin film coating
- Professional: Commercial-grade with thicker, more durable application
Expected Durability
- DIY Kit: 2 to 5 years before issues appear
- Professional: 10 to 20 years with proper maintenance
Risk of Peeling
- DIY Kit: High risk of peeling without proper surface preparation
- Professional: Low risk due to professional-grade prep and products
DIY kits might seem budget-friendly upfront, but they rarely last. The acid etch method used in DIY kits doesn’t properly open the concrete surface, so the epoxy doesn’t bond well.
Professional applications use diamond grinding for a real bond. You’re paying more initially, but a professionally applied floor will outlast a DIY attempt by over a decade. When it comes to garage floors, the investment pays itself back in longevity.
Frequently Asked Questions
How long does an epoxy garage floor last?
Professionally applied epoxy lasts 10–20 years with proper maintenance. DIY kits usually last 2–5 years.
Does epoxy pick up hot tyre marks?
Standard epoxy can be prone to hot tyre pickup in Australian summers. A quality polyaspartic or polyurethane top coat prevents this and is standard with professional applications.
Is an epoxy floor slippery when wet?
Solid colour epoxy can be. Flake floors have natural grip from the texture. An anti-slip additive can be mixed into any epoxy top coat for extra safety.
Can you epoxy a garage with cracks?
Yes. Cracks are filled and repaired during the prep stage. Very large cracks or movement in the slab may need professional assessment first.
How do I maintain an epoxy floor?
Easy. Sweep regularly, mop with a mild cleaner, and avoid dragging sharp or heavy objects across the surface.
Want a showroom garage floor? See our concrete coating service →